If you’ve read our guide on recognising chimney fire warning signs, you’ll understand what causes dangerous creosote build-up and how to spot the symptoms. This follow-up article focuses on prevention—the practical steps you can take to burn safely, maintain your chimney properly, and dramatically reduce your fire risk.
Prevention is straightforward: burn hot, use dry fuel, and maintain your chimney regularly. These three principles, applied consistently, will keep your chimney safe throughout winter and for years to come.
Safe Burning Technique: The Foundation of Prevention
How you operate your stove or fireplace matters more than most people realise. Two people burning identical wood in identical stoves can have completely different outcomes based purely on technique.
Starting Fires Properly
The way you start your fire sets the tone for the entire burn. A properly established fire reaches the right temperature quickly and maintains clean combustion.
Build your fire with adequate kindling—small, dry pieces that catch easily and burn hot. Use proper firelighters, not accelerants or household materials. The top-down method works well: place larger pieces at the bottom, medium pieces in the middle, and kindling on top with firelighters. Light from the top, and flames will work downwards, establishing heat quickly.
Don’t load full-size logs onto a barely-started fire. Establish active flames first, then add larger pieces gradually. Get the temperature up quickly rather than letting the fire smoulder from the start.
Maintaining Active Combustion
Once your fire is established, maintain visible flames rather than just glowing embers. This is the single most important principle for clean burning and creosote prevention.
Active flames indicate proper combustion temperature—above 230°C in the flue, where creosote formation is minimal. Glowing embers without flames mean you’re in the danger zone, typically below 120°C, where creosote deposits form rapidly.
Don’t restrict air supply excessively to “make fuel last longer.” This creates the slumbering fires we discussed in our warning signs article—low temperature, high smoke, maximum creosote formation. It’s a false economy that costs far more in maintenance, sweeping frequency, and fire risk than you save in fuel.
If you must maintain overnight heat, use much less fuel with adequate air supply rather than loading up and closing everything down. Better still, let your fire burn out overnight and restart in the morning. The few minutes required to restart a fire are vastly preferable to the risks of slumbering.
Understanding Your Air Controls
Most stoves have primary and secondary air controls, and understanding how they work together is essential for clean burning.
Primary air provides the main oxygen supply during lighting and when adding fresh fuel. It typically comes from below the fire, feeding oxygen up through the fuel bed. Once the fire is established with active flames, you reduce (but don’t eliminate) primary air.
Secondary air is pre-heated air that enters above the fire, supporting complete combustion of smoke and gases. This is what creates the clean-burning “secondary combustion” that modern stoves are designed for. Secondary air should remain open during normal burning.
Learn your specific stove’s optimal settings through experience. Manufacturer guidance provides a starting point, but every installation differs based on chimney height, draw, fuel type, and external conditions. The goal is active flames with minimal visible smoke from the chimney once the fire is established.
Visual Indicators of Good Burning
Your stove glass tells you a lot about burning quality. If glass stays relatively clean between uses, with perhaps slight discolouration at the bottom, you’re burning well. If glass blackens completely within hours of cleaning, you’re burning too cool, using too-wet fuel, or restricting air excessively.
Minimal visible smoke from the chimney once fire is established indicates good combustion. Some white smoke during lighting is normal, but it should clear within 10-15 minutes as the fire reaches temperature. Continuous grey or white smoke means incomplete combustion and creosote formation.
Active flames rather than lazy, orange smouldering indicate proper temperature. Bright flames with some yellow and orange (not solely orange) show good combustion. Deep orange, lazy flames with lots of smoke indicate too-cool burning.
Fuel Quality: You Can’t Burn Properly With Poor Fuel
Even perfect technique can’t compensate for poor fuel quality. Wood moisture content and fuel type directly determine how cleanly you can burn.
The 20% Moisture Rule
We covered this in the warning signs article, but it’s worth repeating: wood must be below 20% moisture content. This isn’t just a Smoke Control Area requirement—it’s a safety requirement everywhere.
When wood exceeds 20% moisture, a significant portion of heat output goes toward evaporating water rather than producing usable heat. This drops combustion temperature into the danger zone where creosote forms rapidly. The excess moisture creates steam that mixes with smoke to form tar, depositing readily on chimney surfaces.
Even the difference between 18% and 23% moisture is dramatic. It’s not a gradual scale—once you cross 20%, problems accelerate rapidly.
Testing Wood Moisture Properly
Visual inspection cannot determine moisture content. Wood can look dry, have cracks, and feel dry but still contain 25%+ moisture. The only reliable method is using a moisture meter.
Inexpensive models cost £15-30 and are available from hardware stores and online. To test properly, check the split face (interior), not the bark or outside surface. Push the pins 5-10mm deep into the wood. Test multiple pieces from different parts of your stack—don’t just test one piece and assume the rest matches.
Test when you bring wood inside, not just when it’s delivered. Wood moisture can change with storage conditions, and even properly dried wood can re-absorb moisture if stored poorly.
The end grain (cut ends) dries faster than the rest of the wood and can give falsely low readings. Test the sides of split pieces for the most accurate results.
Proper Wood Storage
Wood moisture content isn’t permanent. Properly dried wood below 20% can climb back to 25%+ if stored poorly through a British winter.
Store wood covered but ventilated—not sealed in sheds or wrapped in plastic. Air circulation is essential. Wood needs protection from rain whilst allowing moisture to escape. A roof or tarpaulin over the top with open sides works well.
Keep wood off the ground on pallets, rails, or purpose-built log stores. Contact with ground causes moisture to wick into the wood. Store away from walls and fences to allow air circulation on all sides.
If storing unsplit logs, place them bark-side up. Bark provides some natural weather protection. For split wood, any orientation works provided it’s covered and ventilated.
Avoid storing wood in damp sheds, garages, or outbuildings where humidity stays high. Even if the wood itself isn’t getting wet, high humidity prevents moisture from leaving and can even cause re-absorption.
What Never to Burn
Certain materials are dangerous to burn regardless of moisture content:
Treated, painted, or preserved wood produces toxic fumes and can damage your stove and flue. This includes any wood that’s been chemically treated, fence panels, decking, pallets marked with chemical treatment codes, or old furniture with paint or varnish.
Manufactured wood products like plywood, chipboard, MDF, or laminated furniture contain adhesives and resins that produce harmful fumes and excessive creosote.
Household waste, cardboard, paper, and plastics are not fuel and create problematic emissions.
Driftwood or wood from the sea has high salt content that damages stoves and produces corrosive combustion products.
Green or unseasoned wood—regardless of how long it’s been stored—produces excessive smoke and creosote.
The Role of Professional Sweeping
Regular professional sweeping is your primary defence against chimney fires. Even with perfect burning technique and ideal fuel, some deposit accumulation is inevitable over time.
Why Sweeping Prevents Fires
Professional sweeping removes accumulated deposits before they reach dangerous levels. Stage 1 creosote (dry, flaky soot) brushes away easily during standard sweeping. Catching deposits at this stage prevents progression to Stage 2 (sticky tar) or Stage 3 (glazed, hardened deposits) that are far more dangerous and difficult to remove.
Sweeping maintains proper draft. A clean chimney draws better, which improves combustion temperatures and actually reduces further deposit formation. It’s a positive cycle—clean chimney, better burning, less deposit formation.
Each sweep includes visual inspection of accessible components. Professional sweeps can spot concerning deposits, identify damaged parts, assess whether you’re burning properly based on deposit type, and catch developing problems early.
Sweeping creates a maintenance record. Certificates provide proof of proper maintenance for insurance claims, demonstrate reasonable care if problems occur, and maintain property value when selling.
Sweeping Frequency
At minimum, any solid fuel appliance should be swept once per year. This is both an insurance requirement and a safety necessity.
However, minimum frequency isn’t always sufficient. If you burn wood daily throughout winter, twice per year is recommended—once in the middle of the heating season (January or February) and once at the end of the season (spring). This catches accumulation during the peak usage period and ensures you start the next season with a clean system.
Heavy users who burn 12+ hours daily should consider sweeping every 4-6 months. The more intensively you use your chimney, the faster deposits accumulate regardless of how well you burn.
Frequency should also increase if you notice warning signs: rapid glass blackening, poor draft, visible deposits, or any symptoms we discussed in the warning signs article. Don’t wait for your scheduled sweep if problems develop—address them immediately.
What Professional Sweeping Involves
A proper chimney sweep includes physical sweeping of the full height to remove soot and creosote deposits, cleaning of the stove or fireplace opening and throat area, removal of debris, nests, or blockages, and smoke chamber cleaning if accessible.
Visual inspection examines accessible chimney components, assesses deposit type and severity (which indicates how you’ve been burning), identifies damage, deterioration, or concerns, and checks stove or fireplace condition.
You receive an official sweep certificate for insurance purposes, notes on condition and any concerns, recommendations for repairs or further investigation, and a record for your maintenance history.
The sweep should also provide professional advice: guidance on burning practices if deposits suggest problems, fuel recommendations specific to your appliance, and identification of issues affecting performance.
When Sweeping Isn’t Enough
Standard brush sweeping effectively removes Stage 1 creosote, but more severe deposits require additional treatment.
Stage 2 creosote—sticky, tar-like deposits that may drip—often requires chemical treatment such as Cre-Away. The chemical breaks down tar over several burns (typically 1-2 weeks), after which follow-up sweeping removes the residue.
Stage 3 creosote—hardened, glazed deposits that look like glass—cannot be removed by standard brushes. This requires specialist chemical treatment, professional rotary sweeping equipment, or in severe cases, liner replacement.
Damaged liners with cracks, gaps, or deterioration cannot be swept back to safe condition. They require repair or replacement, with CCTV survey determining the extent of damage.
This is why catching problems early through regular sweeping and proper burning technique is so important. Once you have Stage 3 creosote or damaged liners, you’re looking at significant expense to restore safety.
Load Management and Refuelling
How much you burn at once and how you add fuel both affect creosote formation and safety.
Don’t Overload Your Stove
Manufacturers specify maximum fuel loads for good reasons. Overloading restricts air circulation around pieces, prevents proper combustion, and can lead to excessive heat that damages stove components.
As a general rule, fill no more than two-thirds full for most stoves. This allows adequate space for air circulation and flame development. Smaller, more frequent loads typically burn cleaner than large, infrequent ones.
Adding Fuel Gradually
Add fuel gradually as the previous load burns down rather than waiting until everything is nearly consumed and then loading up completely. This maintains consistent temperature rather than the temperature cycling that occurs with complete reload cycles.
When adding fresh fuel to established fires, open air controls slightly to help the new fuel catch. Once it’s burning with active flames, adjust back to your normal settings. Don’t close down air controls immediately after adding fuel—this creates the cool, smoky conditions that form creosote.
Log Sizing Matters
Use pieces appropriate for your stove size. For most domestic stoves, pieces with 7-10cm diameter work well. Very large pieces don’t burn completely and can’t be positioned to allow good air circulation. Very small pieces burn too quickly and can lead to overloading as you continuously add more fuel.
Split wood burns far better than rounds. The split faces create more surface area for combustion and allow better air penetration. If you’re buying wood, specify split pieces rather than accepting rounds.
Mix sizes slightly for optimal burning. A combination of medium and smaller pieces allows better packing whilst maintaining air gaps.
Cambridge-Specific Advice
Local conditions and property types affect how you should approach chimney maintenance and burning.
Property Types Common in Cambridge
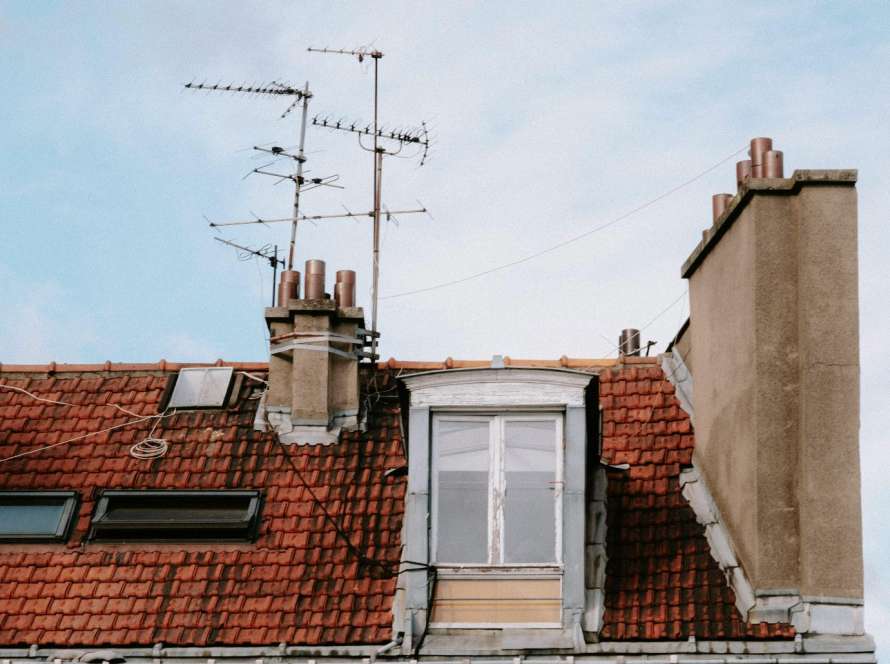
Victorian and Edwardian properties dominate much of Cambridge. These often have original chimneys lacking modern liners, narrow flues more prone to restriction from deposits, and shared chimney stacks in terraces where multiple properties share one structure.
If you have an original, unlined chimney, you have less margin for error. Deposits accumulate on rough masonry surfaces more readily than on smooth liner surfaces. Unlined chimneys are also more vulnerable to damage from chimney fires, as there’s no protective barrier between fire and structural masonry.
Shared chimneys create shared responsibilities. If one neighbour in a terrace burns poorly, creates blockages, or damages the shared structure, it affects everyone. Coordinated maintenance is essential, and it’s worth knowing what your neighbours are doing with their fires.
Listed buildings present additional challenges. Restrictions on modifications may limit your ability to install modern liners or make improvements. You may need specialist advice on how to burn safely within the constraints of listed building regulations.
Local Weather Patterns
Cambridge’s low-lying river valley location affects air pressure and chimney draft. You may notice draft variations with weather changes, particularly during very cold or very calm conditions.
January often includes mild spells that tempt people to bank down fires for just background heat. Resist this temptation—these slumbering fires during mild weather create maximum creosote whilst providing minimal useful heat.
The damp climate means wood storage requires extra attention. Higher humidity affects even covered wood. Test fuel regularly rather than assuming it stays at the moisture level it was when delivered or when you first tested it.
The Smoke Control Area Connection
Cambridge’s citywide Smoke Control Area expansion, expected in 2027, is directly relevant to fire prevention. The rules requiring approved fuels or DEFRA-approved stoves inherently encourage cleaner burning.
DEFRA stoves are designed for secondary combustion that burns at higher temperatures and produces less creosote. The 20% moisture requirement for wood in SCAs is exactly the same threshold that prevents creosote formation. Compliance with SCA rules and chimney fire prevention overlap almost completely.
If you’re already burning properly with dry fuel in a DEFRA stove, you’re both SCA-compliant and minimising fire risk. The regulations work with safety rather than against it.
What to Do If You’ve Identified Problems
If you’ve read our warning signs article and recognised symptoms in your own burning, here’s what to do.
Minor Warning Signs
If you’re experiencing glass blackening rapidly, poor draft, or visible smoke, these indicate technique or fuel problems but don’t necessarily mean dangerous deposit levels yet. Take action now:
Test your wood moisture—you may discover it’s higher than expected. Even wood from reliable suppliers can absorb moisture during storage. Adjust your burning technique by increasing air supply, maintaining active flames, and avoiding slumbering. Book a chimney sweep earlier than scheduled to assess deposit levels and get professional guidance.
Serious Warning Signs
If you’ve seen tar dripping, heavy creosote flakes, or experienced smoke smell when fire isn’t burning, stop using your chimney immediately. These indicate dangerous deposit levels that require professional attention before continued use.
Book an inspection with a qualified sweep who can assess whether standard sweeping is sufficient or if chemical treatment is needed. A CCTV survey may be recommended to check for damage. Don’t restart using your chimney until a professional has assessed it and confirmed it’s safe.
After Suspected Fires
If you’ve had what you think might have been a chimney fire—even if you’re not certain—do not use the chimney again until it’s been professionally inspected with CCTV survey.
Chimney fires cause internal damage that’s not visible from outside. Continuing to use a damaged chimney risks catastrophic failure. Your insurance should be notified even if you’re not making a claim. Get written documentation of the inspection and any repairs needed.
Insurance and Maintenance Records
Keep meticulous records of all chimney-related maintenance. This includes sweep certificates from every sweep since installation, receipts and documentation for any repairs, CCTV survey reports if conducted, and correspondence about chimney condition or concerns.
If a chimney fire occurs and you cannot prove regular professional maintenance, your insurer may deny your claim even if you have coverage. The certificates aren’t just paperwork—they’re financial protection that could be worth thousands of pounds in a claim situation.
Most policies specifically require annual sweeping by qualified professionals. “I sweep it myself” or “my friend who used to be a sweep does it” doesn’t meet insurance requirements. Only certificates from currently qualified, insured professionals count.
Frequently Asked Questions
How can I tell if I’m burning at the right temperature?
Active flames with minimal visible smoke from the chimney once established indicates good temperature. Your stove glass staying relatively clean (perhaps slight discolouration at the bottom but not completely black) shows proper combustion. If you have a flue thermometer, aim for 230-400°C. Below 120°C you’re in the danger zone for maximum creosote formation.
Is it worth installing a flue thermometer?
Yes, particularly if you’re learning how your stove behaves or if you’ve had deposit problems. Flue thermometers (£20-40) give you objective feedback about burning temperature. They help you learn what proper temperature feels like and looks like, after which you may not need to check constantly. They’re especially useful during the learning period after stove installation or after switching fuel types.
Can I use those creosote-removing chemical logs instead of professional sweeping?
Chemical treatments like Cre-Away are useful for Stage 2 or 3 creosote that standard sweeping struggles with, but they’re supplements to sweeping, not replacements. You still need professional brush sweeping to physically remove soot, inspect chimney condition, clear blockages, and get expert assessment. Chemical logs burned as prevention have limited effectiveness—they can’t replace proper burning technique and regular maintenance.
My wood supplier says their wood is seasoned, but should I still test it?
Yes, always test. “Seasoned” means different things to different people. Some suppliers are excellent and genuinely provide below-20% wood. Others store wood poorly, don’t test properly, or simply aren’t honest. Even well-intentioned suppliers can deliver wood that’s absorbed moisture during transport or storage. Test when it arrives and test again when you bring it inside. A £20 moisture meter protects you from expensive problems.
Does the type of wood (oak, ash, birch, etc.) affect creosote formation?
Moisture content matters far more than species. Dry oak at 18% moisture burns cleaner than wet ash at 25%. That said, some differences exist: softwoods contain more resin and can create more deposits even when dry, hardwoods generally burn hotter and longer but must still be dry, and different species produce different amounts of ash. Focus on moisture content first, species characteristics second.
How do I know if my chimney needs a liner?
If your chimney was built before modern building regulations (pre-1960s typically), it may lack a liner. Signs you might need one include: original Victorian/Edwardian chimney without visible liner, smoke smell in rooms when burning, poor draft that can’t be explained by deposits, visible deterioration of internal masonry, or shared chimney with multiple properties. A CCTV survey definitively shows whether you have a liner and its condition. Many older Cambridge properties benefit significantly from liner installation.
Can I reduce sweeping frequency if I always burn perfectly?
No. Even perfect burning creates some deposits over time. Insurance requires annual sweeping minimum regardless of how well you burn. Perfect burning reduces how much accumulates between sweeps, but it doesn’t eliminate the need for sweeping. Think of it like servicing a car—even if you drive perfectly, regular maintenance is still essential. Heavy users need more frequent sweeping regardless of technique.
Prevention Is Simpler Than It Sounds
Preventing chimney fires comes down to three principles consistently applied: burn hot with active flames rather than slumbering, use dry fuel below 20% moisture content, and maintain your chimney with regular professional sweeping.
These aren’t complicated requirements. They don’t require expensive equipment or specialist knowledge. What they do require is attention and consistency—testing your fuel, adjusting your technique, and keeping up with maintenance.
The effort is minimal compared to the consequences of chimney fires: property damage, potential injury, insurance complications, and the expense of repairs. Prevention is always easier and cheaper than dealing with problems after they occur.
If you’re experiencing any of the warning signs from our previous article, or if you’re unsure about your current burning practices, professional guidance helps. We’ve been serving Cambridge since 1980 and understand local property types, weather patterns, and the specific challenges Cambridge homeowners face.
Expert Chimney Services for Clean, Compliant Burning
Getting the most from your chimney while meeting UK emission standards requires professional expertise. As authors of the City & Guilds Chimney Sweeping Qualification and certified Guild of Master Chimney Sweeps, Ablewight Chimney Services combines industry-leading knowledge with practical experience.
Our comprehensive chimney services ensure optimal performance, legal compliance, and safety:
- Professional chimney sweeping – Annual cleaning and maintenance
- CCTV chimney surveys – Advanced inspection technology
- Stove servicing – Complete maintenance and performance optimisation
- Bird nest removal – Wildlife-compliant clearance
- Bee nest removal – Safe clearance
- Tar and creosote removal – Specialist cleaning for heavy deposits
- Compliance certification – Insurance-valid documentation
- Expert advice – Personalised solutions for your heating system
Why Choose Ablewight:
- HETAS Approved for professional standards
- Trading Standards Approved for consumer protection
- Guild of Master Chimney Sweeps certified
- £5 million public liability insurance
- No-mess guarantee on all work
Get Professional Chimney Care Today:
- 01223 627012
- hello@ablewight.co.uk
Service Areas: Cambridge • Ely • Newmarket • Royston • Saffron Walden • St Ives • Huntingdon • St Neots • Bishop’s Stortford • All surrounding villages within 25 miles
Don’t compromise on safety, performance, or compliance. Contact Ablewight Chimney Services today for professional expertise you can trust.